In previous articles, Taimienphi showed readers how to change dns on Windows to surf the web, watch movies and listen to music better, now we would like to share another trick, DNS change trick on Xiaomi phones.

Change DNS on Xiaomi phones
Why change DNS on Xiaomi phones?
– Help users access the network more easily and stably.
Access blocked websites like Facebook without using the app
– Increase accuracy, more security.
– Some safe, reputable DNS addresses many users:
+ Google DNS: 8.8.8.8, 8.8.4.4
+ OpenDNS: 208.67.222.222, 208.67.220.220
+ DNS singapore: 165.21.83.88, 165.21.100.88
Guide to change DNS on Xiaomi phones
- 1. Quick Start Guide
- Step 1: Go to the Wifi network settings, select Wifi to change DNS.
Step 2: Convert DHCP to Static
Step 3: Enter the new DNS in DNS 1 and DNS 2, save the changes.
2. Detailed instructions
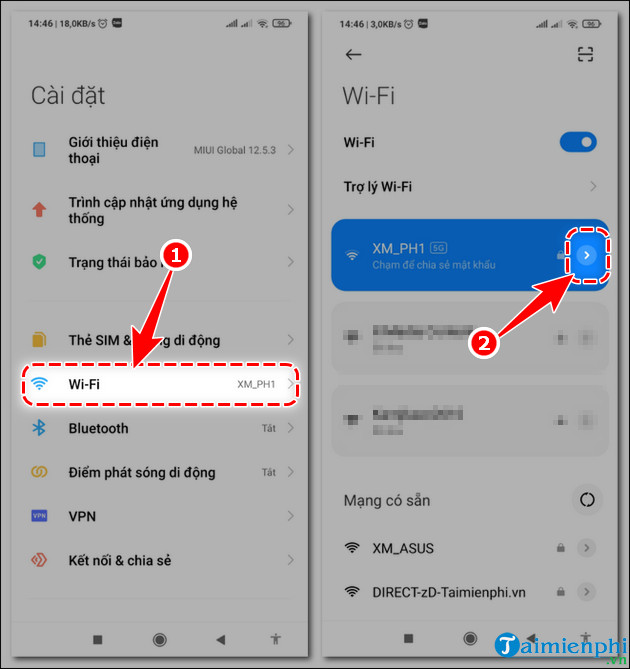
Step 1: Go to Settings on your Xiaomi phone.
Step 2: Select Wi-Fi => click the arrow icon next to the Wifi network to change DNS.
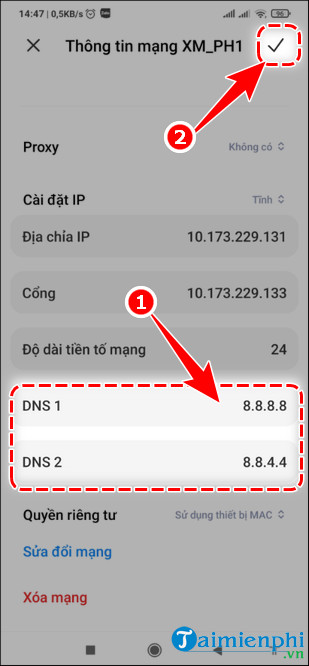
Step 3: Then click DHCP under IP Settings, select Static.

Step 4: Scroll down, enter DNS in DNS 1 and DNS 2 => press the V tick to save the modified DNS on Xiaomi phones.
– For example: Taimienphi uses Google DNS which are 8.8.8.8 and 8.8.4.4
– There are many other common DNS addresses that you can use to improve internet access speed watching movies, listening to music, going to facebook …
https://thuthuat.taimienphi.vn/cach-doi-dns-tren-dien-thoai-xiaomi-70817n.aspx
So Taimienphi has just shared with readers how to change DNS on Xiaomi phones, similar to the ways