In the process of using Windows 10, you will need many different types of fonts for different needs such as work, entertainment, personal hobbies … therefore, we will show you how to install fonts for Windows 10.
Sometimes you open a new text file, but it cannot be read because the character has been encoded. One of the reasons is that the Windows 10 computer you use does not have a font that matches that text, to solve this problem, you need to find and install the missing font for your computer

How to Install Fonts for Windows 10?
Instructions for installing fonts for Windows 10
To install fonts for Windows 10, follow the instructions below:
Step 1: First you need to download the font you want to your computer, you can refer to and download here:
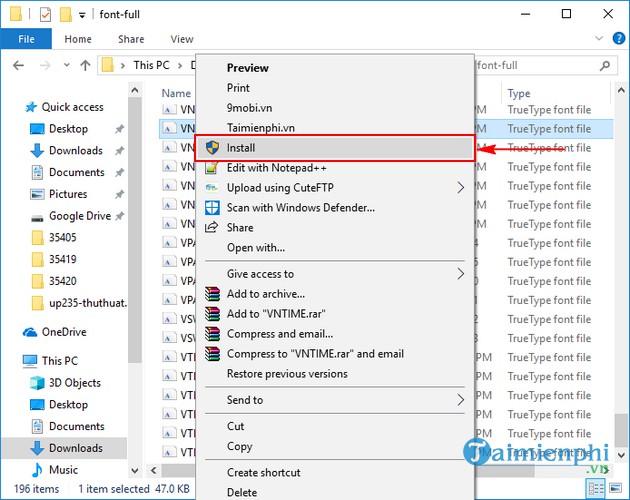
Step 2: Install the font you want. There are 2 ways to install fonts, specifically as follows.
Method 1: You right-click on the font you want to install, select Install.
Method 2: If you want to install multiple fonts, just copy all the downloaded fonts to the C:WindowsFonts folder. Then Win 10 will automatically install new fonts for you.

So with the above method, you have finished installing fonts for Windows 10 for your computer. Now you can use fonts like Vntime, beautiful artistic fonts for text and text editors when needed.
How do I remove the installed font?
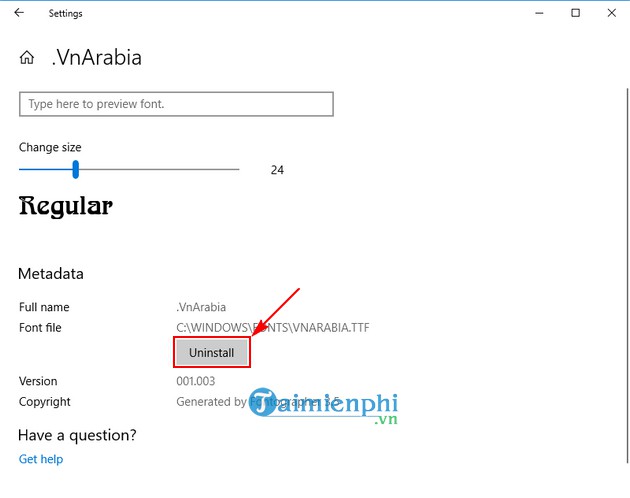
If you want to remove the installed font, open the Start Menu, type “font”, select Font preview and related settings, Font Settings will appear. Here you find the font you want to remove, select Uninstall to remove that font from your computer system.
In the example below I want to remove the font VnArabia
https://thuthuat.taimienphi.vn/cach-cai-dat-font-chu-cho-win-10-35405n.aspx
Above is an article on how to install fonts for Windows 10. In addition, you can access Software to find more font sets you want, such as how to