How to add and create drop shadow effects in Photoshop CC 2020 has been much more optimized than previous versions of Photoshop CS6, or CC 2015, 2019, so even if you are new to learning about the software, users can still create their own shadow effects for text, simple and beautiful people or objects.
Creating a drop shadow effect in Photoshop is a frequently used trick when editing, the design brings a realistic, vivid feeling to the image. Beautiful effects, and also simple execution.

As the title of the article, Taimienphi will make a tutorial on how to create a drop shadow effect in Photoshop CC 2020. Therefore, users need to download and install Photoshop CC 2020 on the device.
– Download Photoshop CC here: Download
Create a Drop Shadow Effect in Photoshop CC 2020
1. Create a drop shadow effect for text
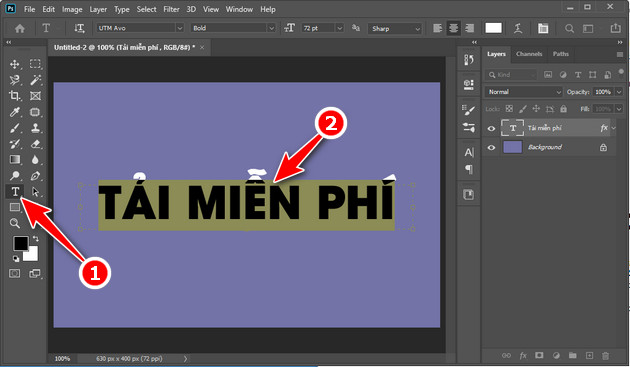
Step 1: Open Photoshop and create a new image file. Tap the Type Tool on the toolbar on the left side of the screen to type text.
In this example, Taimienphi has created a new image file with a size of 630 x 400 pixels, a purple background, and entered the words Download Free.
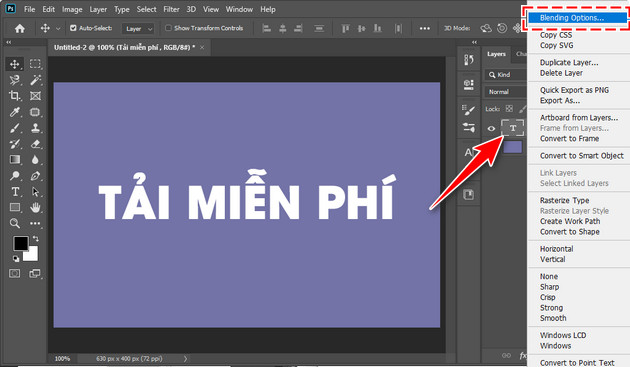
Step 2: Right-click the text layer in the Layers tool pane and choose Blending Option.
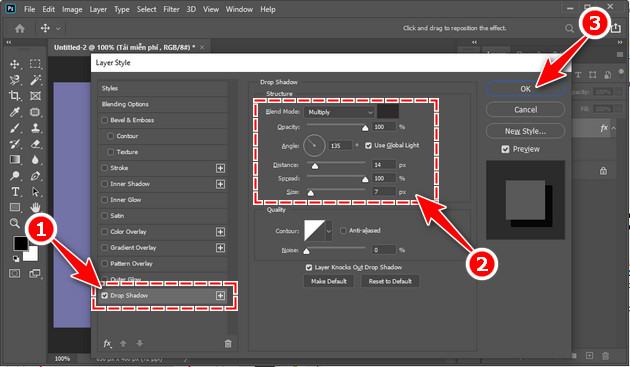
Step 3: In the Layer Style panel, check the Drop Shadow item. Here, you adjust the parameters, to create the shadow effect you want:
– Angle : Shadow direction
– Distance : The distance between the effect and the text
– Spread: The intensity of the shadow
– Size : The size of the ball.
Once done, click OK to switch save settings again.
In the example Taimienphi has set parameters Angle (135 ), Distance (14), Spread (100%), Size (7).
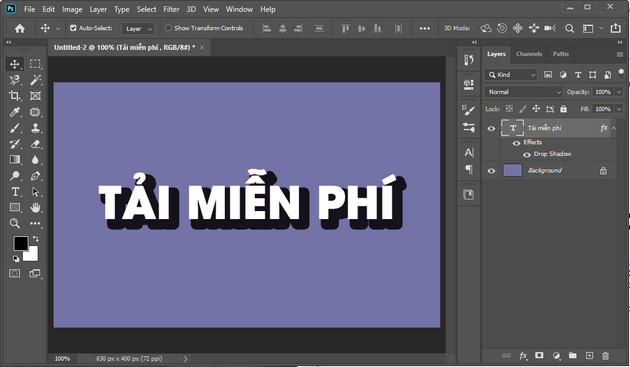
Immediately, the effect will be applied to the text and have the results shown below.
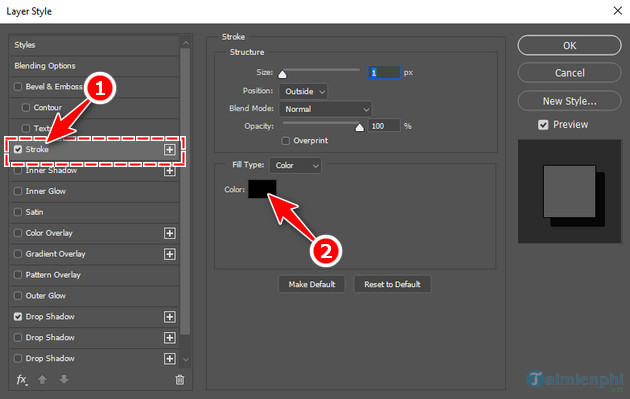
Step 5: In case you are not satisfied, want to create a longer shadow effect for the image, right-click on the text layer and select Blending Option . Here, add a tick to the Stoke section, select the Color that resembles the shadow.
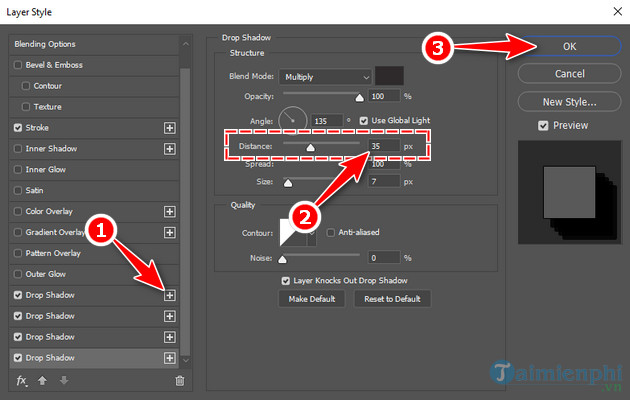
Step 6: Next, you tap on the + icon next to the Drop Shadow to create more drop shadow effects for the image.
Click on the newly created Drop Shadow item and adjust the Distance parameter to be larger than the first effect. Once done. Press OK to apply the settings to the image.
In the example, Taimienphi has created 4 new shadow effects. Each new effect is 7px larger than the old.
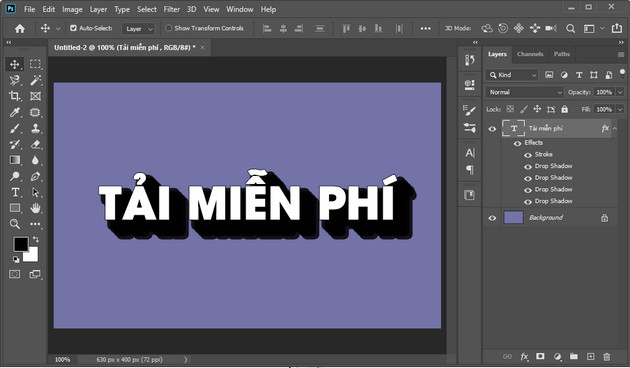
After the new shadow effect was added, the shadows of the text were longer than in the old illustration.
2. Create a shadow effect for people or objects
Step 1: Open the image, person, or object that you want to effect a drop shadow in Photoshop CC 2020.
Step 2: Press the keyboard shortcut Ctrl + J to duplicate the image layer, we get a new Layer with the default name of Layer 1 as shown.
Then, you use the area selector to remove unnecessary background around the object. Since this is a relatively simple image, Taimienphi uses the Magic Wand Tool (Keyboard Shortcut W) to select the surrounding background and press the Delete button to delete.

For more complex images, Taimienphi previously had 1 tutorial to
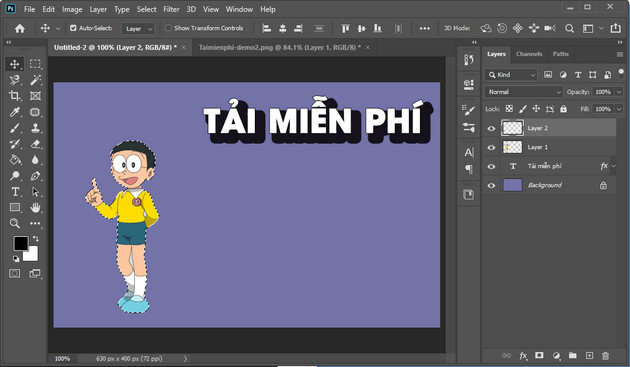
Step 3: Select the Layer 1 that you just removed the background from, then press Ctrl + C to copy. Switch to the new image page and press Ctrl + V to Paste .
Step 4: Press the keyboard shortcut Ctrl + Shift + N to create a new layer.
Hold down the Shift key and left-click on Layer 1 – which contains the object to be shaded and the newly created Layer 2 .
Next release the Shift key, hold down the Ctrl key and left-click on Layer 2 . At this point, a border appears to surround the object to be shadowed.
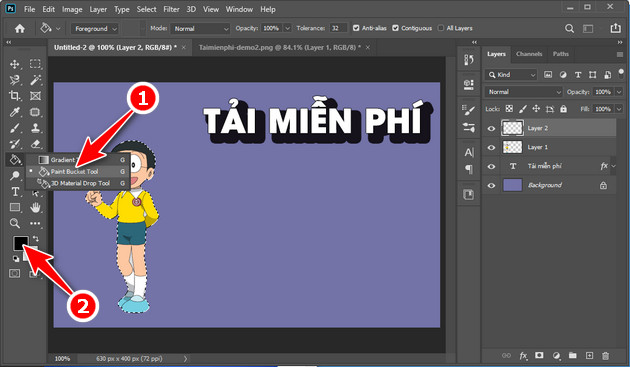
Step 5: Left-click Layer 2 in the Layers pane. Next, select the Paint Bucket Tool (Keyboard Shortcut G) and select black. Point your mouse at the object in the border and left-click to proceed with coloring.
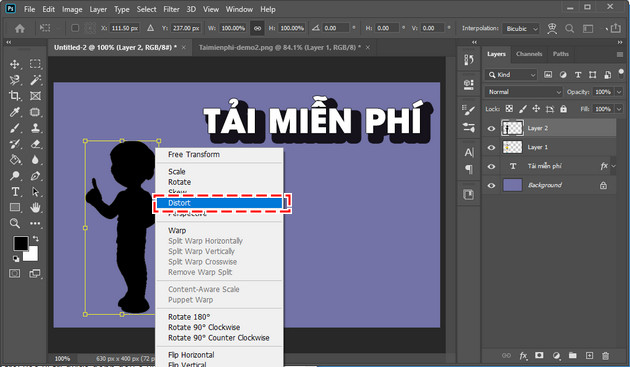
Step 6: Press the keyboard shortcut Ctrl + D to cancel the selection of the border surrounding the object. Next, you press the keyboard shortcut Ctrl + T , then select Distort .
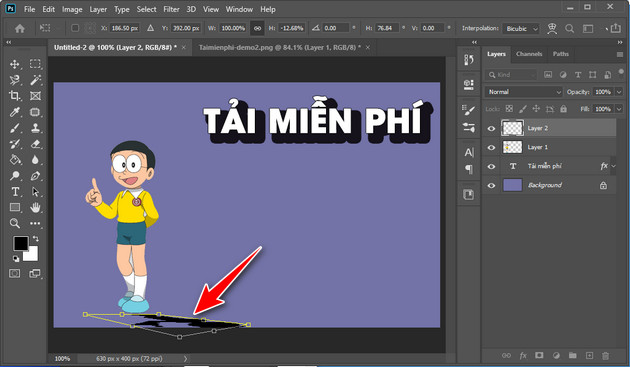
Step 7: Tap the squares in the corners of the frame surrounding the subject, dragging towards the desired direction to create a shadow effect.
Step 8: Drag Layer 2 containing the shadow effect below Layer 1 containing the object image to avoid shadows overlaying the character or object.
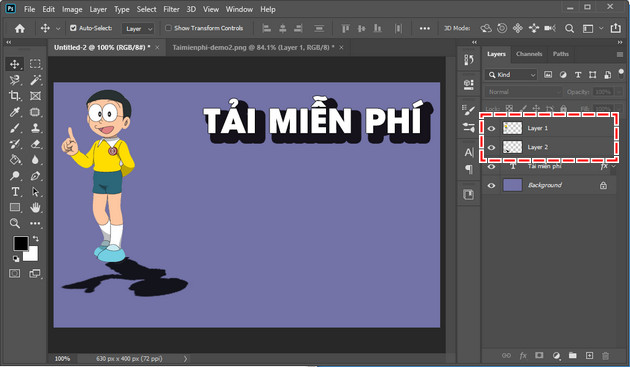
After re-aligning 1 more time, you will get a final product as shown below.

https://thuthuat.taimienphi.vn/cach-tao-hieu-ung-bong-do-trong-photoshop-cc-2020-56302n.aspx
So Taimienphi has in turn introduced to you 2 ways to create drop shadow effects in Photoshop CC 2020 for specific text and objects, with Photoshop CS6 or CC 2019 versions can also be done. The tutorial is long, but the actual implementation process is relatively quick and simple. In the process of implementation, if you have questions, please ask questions soon in the comments for Taimienphi to answer.